
Recognizing Hurricane Roof Damage: A Comprehensive Approach
How to Identify Hurricane Roof Damage Effectively
The aftermath of a hurricane can leave roofs severely compromised, risking structural integrity, safety, and home value. Homeowners must identify damage quickly, often turning to hurricane roofing measures to secure insurance claims and protect their property. This guide offers step-by-step insights into inspecting hurricane roof damage, covering safety measures, essential tools, and the importance of professional assessments to support timely repairs and prevent further deterioration.
Key Takeaways
- A systematic roof inspection after a hurricane helps identify critical damage.
- Both ground-level and detailed inspections are necessary to spot issues not visible from afar.
- Documenting damage with photos and notes is essential for insurance claims and repair estimates.
- Understanding wind, hail, and debris damage guides repair strategy.
- Indoor inspections can reveal hidden water damage and structural issues that need immediate attention.
Preparing for a Safe and Thorough Roof Damage Inspection
Before inspecting hurricane roof damage, safety is paramount. Homeowners should secure loose objects, wear protective gear, and ensure ladders or climbing equipment are in safe condition. Checking local weather updates is crucial to avoid hazardous conditions.
Prioritize Safety Before Your Hurricane Roof Damage Inspection
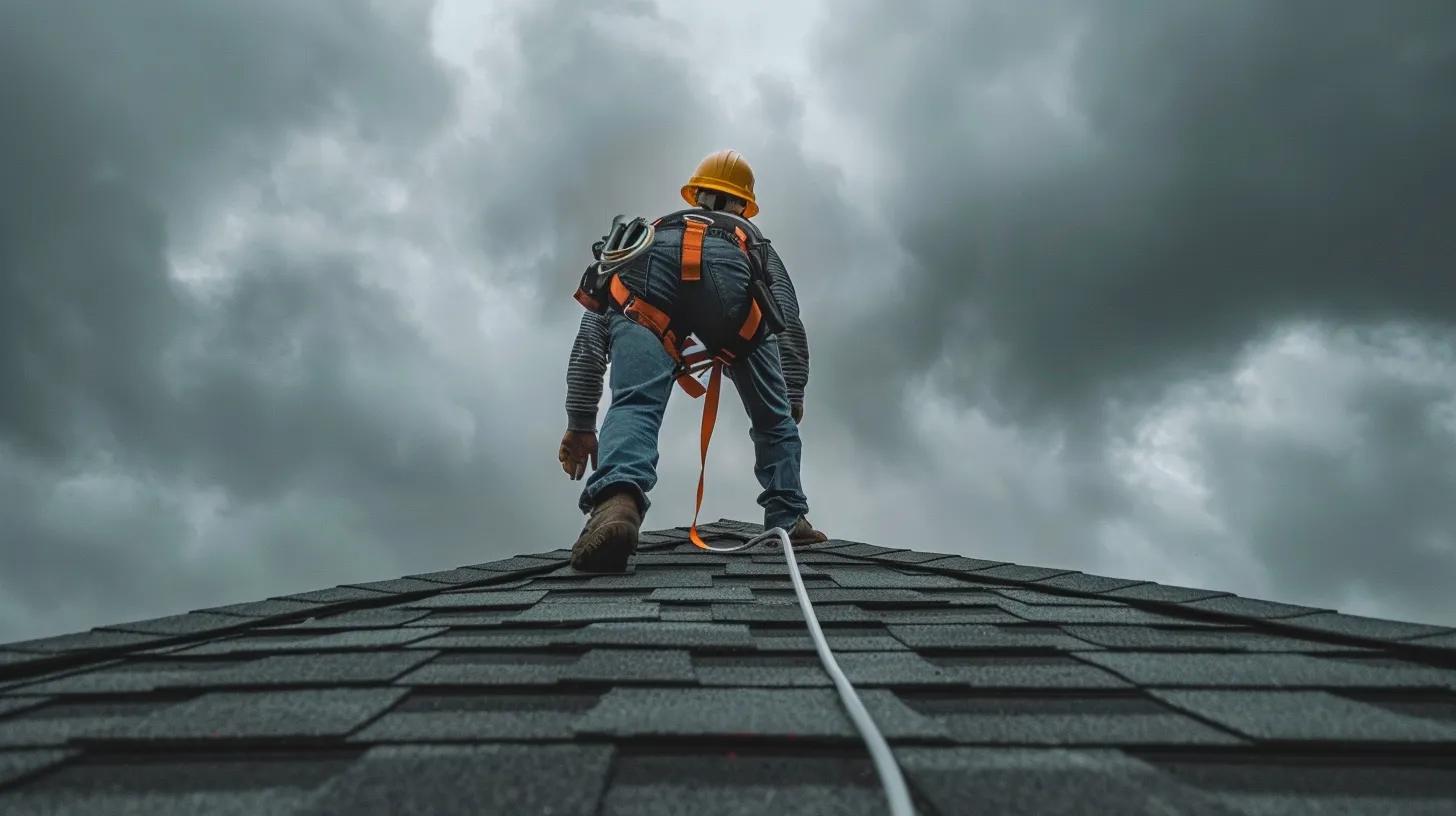
Always work with a friend or family member during the inspection so help is available if needed. Avoid climbing onto a roof after a storm until a professional confirms the structure’s stability, especially when signs of severe wind uplift or instability are present.
Gather Essential Tools for Effective Roof Damage Identification
For accuracy and safety, bring a sturdy ladder, binoculars for viewing from a distance, a camera or smartphone to document damage, and a notepad for recording observations. These tools help inspect every part of the roof without unnecessary risks.
Understand When a Professional Roof Inspection Is Necessary
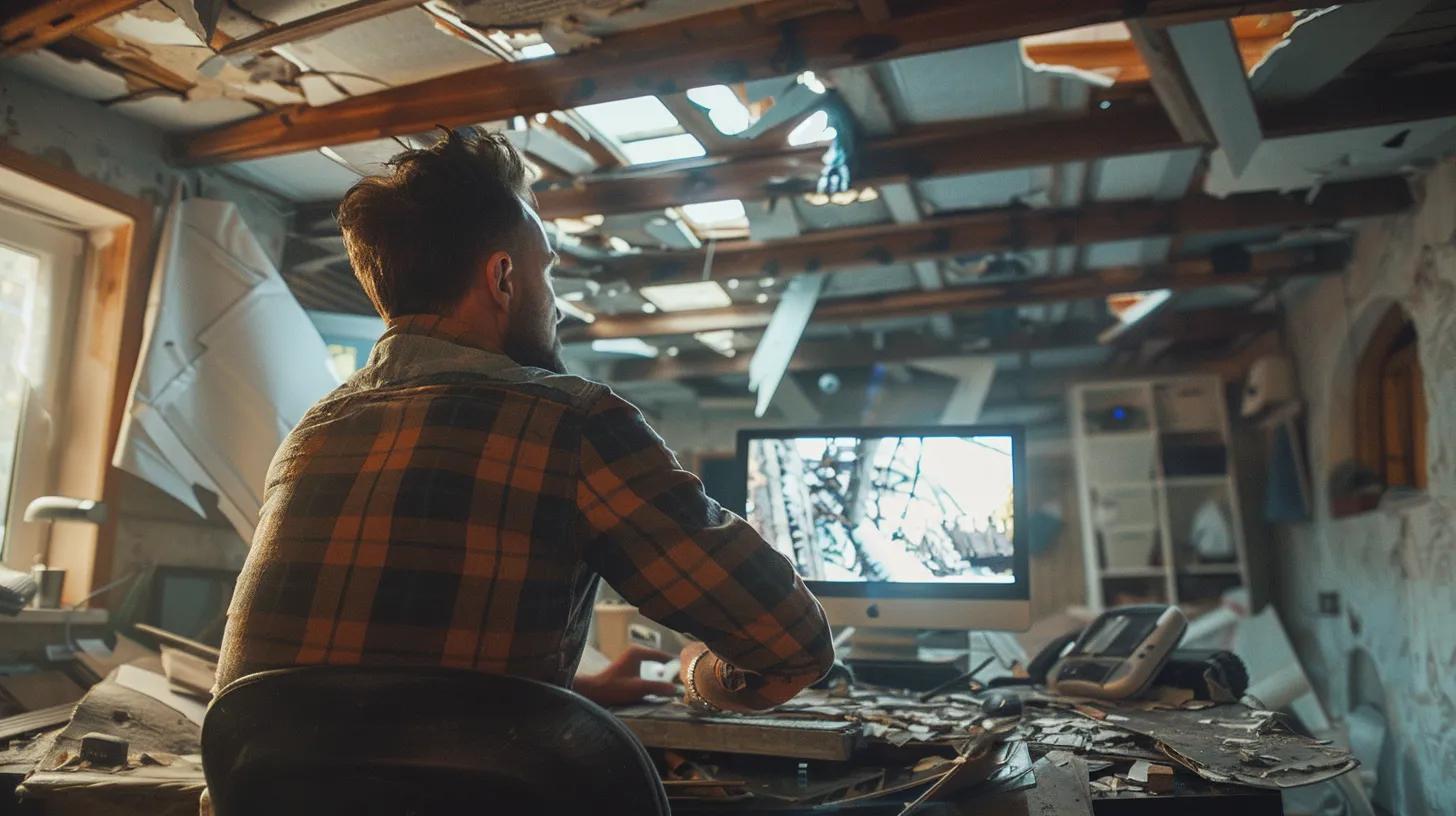
Not all damage can be safely or accurately assessed by the homeowner. If the roof shows signs of structural compromise or hidden internal damage like water stains or sagging, it is important to contact a licensed roofing contractor. Professionals can detect subtle degradation and leaks that may not be obvious during a self-inspection.
Review Your Homeowners Insurance Policy for Coverage Specifics
Review the homeowners insurance policy to understand its coverage limits and deductible details. Knowing whether wind, hail, and water damage are covered helps decide if a professional inspection is warranted and informs proper documentation for claims.
Plan Your Inspection Route for Comprehensive Coverage
Map out a systematic inspection route across the entire roof. Starting at one edge and moving methodically minimizes missed areas and repeated climbs, ensuring efficient and complete coverage.
Conducting an Initial Ground-Level Roof Damage Assessment
Begin with a safe, ground-level inspection to identify obvious damage. This method reduces the risks associated with climbing ladders immediately after a storm.
Visually Scan the Entire Roof From a Safe Distance
Walk around the house and visually check the roof for missing shingles, debris, or dents. This first review gives an overall sense of the roof’s condition before a detailed examination.
Spot Missing or Misaligned Shingles Caused by High Winds
High winds can dislodge shingles, resulting in gaps or misalignments. Note these areas, as missing or non-aligned shingles increase the risk of water leaks and further deterioration, and should be addressed promptly.
Look for Debris Accumulation and Impact Marks on the Roof Surface
Debris such as branches or leaves may mark the roof with dents and cracks, indicating impact damage. These marks often signal compromised waterproofing, necessitating timely repair by a contractor.
Examine Gutters and Downspouts for Damage or Blockages
Gutters and downspouts direct water away from the roof and foundation. Look for blockages, dents, or misalignments during the inspection because damage here can lead to water pooling and further structural issues.
Check for Damage to Soffit and Fascia Areas
Inspect soffit and fascia for cracks, warping, or detachment. Damage in these areas may reflect broader structural problems that require professional evaluation.
Performing a Detailed Exterior Roof Damage Inspection

After the initial external review, conduct a more detailed exterior inspection when it is safe. Use binoculars or safely access parts of the roof to identify subtler signs of damage.
Carefully Access the Roof or Use Binoculars for Closer Views
When conditions permit, inspect closer by carefully accessing safe roof areas or using binoculars. This helps spot minor damages that might not have been visible during the ground-level walk-around, establishing the full scope of the damage.
Identify Lifted or Curled Shingle Edges Indicating Wind Uplift
Look for shingles that are lifting or curling at the edges, a clear sign of wind damage. These alterations reduce the shingle's effectiveness and increase the risk of water penetration, necessitating prompt documentation and repair.
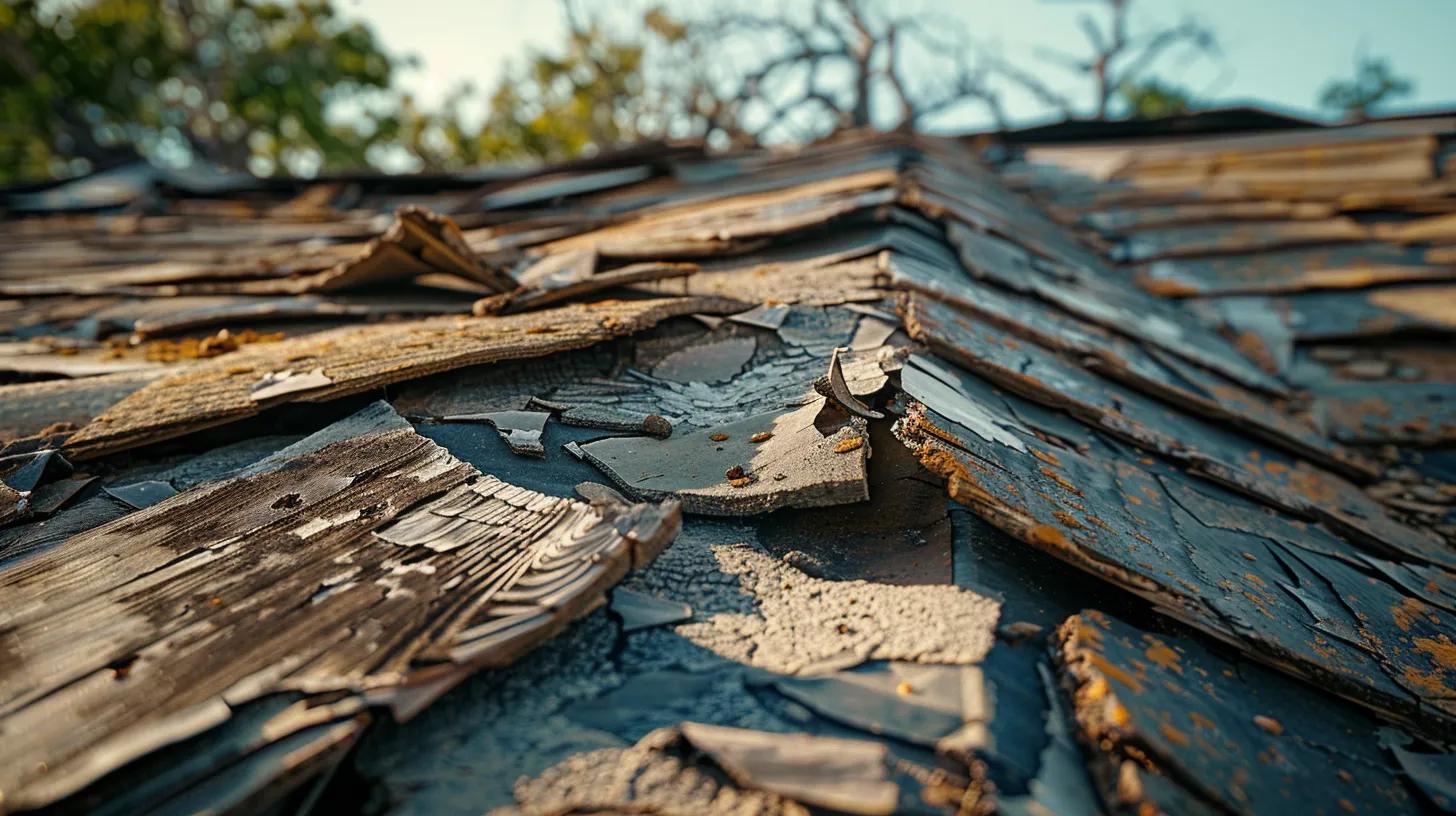
Find Cracks and Breaks in Shingles or Roofing Tiles
Inspect for cracks or breaks in the roofing material. Even small fractures can allow water infiltration, leading to larger structural issues if not repaired in time.
Detect Granule Loss From Asphalt Shingles
Granule loss appears as bare patches on asphalt shingles; since granules protect shingles from UV damage, their loss indicates a compromised roof that may deteriorate faster. Photograph these areas for accurate repair planning and insurance documentation.
Inspect Flashing Around Chimneys, Vents, and Skylights
Flashing is key to waterproofing around roof penetrations such as chimneys, vents, and skylights. Check for gaps, misalignments, or damage in these areas, as even minor deficiencies can lead to significant leaks during heavy rain.
How to Inspect Hurricane Roof Damage From Inside Your Home
Internal inspections can reveal damage not obvious from the exterior. This phase helps complete the overall assessment of roof integrity after a hurricane.
Check Your Attic for Water Stains or Wet Insulation
Inspect the attic for water stains, damp patches, or wet insulation. These signs confirm that water has penetrated the roof and may indicate further structural issues that require immediate repair.
Look for Daylight Visible Through the Roof Decking
Daylight shining through the roof decking is a critical indicator that the roofing materials are compromised. This not only signals possible leaks but also an urgent need for maintenance to prevent further water damage.
Identify Mold Growth or Musty Odors in the Attic Space
Mold growth or persistent musty odors suggest chronic moisture problems. These issues affect both the roof structure and indoor air quality, indicating the need for remediation and repair.
Examine Ceilings and Walls for Signs of Water Intrusion
Within the home, inspect ceilings and walls for discoloration, sagging, or peeling paint that may indicate water intrusion. Early detection can prevent extensive interior damage and costly repairs.
Inspect Around Interior Vents and Light Fixtures for Leaks
Since vents and light fixtures penetrate the roof, check around them for any leakage. Document any signs of moisture intrusion to help direct repair efforts where they are most needed.
Recognizing Specific Types of Hurricane-Induced Roof Damage
Different types of hurricane damage require tailored repair approaches. Recognize the differences to determine the urgency and nature of repairs.
Differentiate Between Wind, Hail, and Debris Impact Damage
Hurricanes typically cause a mix of wind, hail, and debris damage. Wind damage may show as lifted shingles or separated materials; hail damage can cause dents or pockmarks; debris impacts may puncture the roofing material. Accurate documentation of each type guides proper repair and insurance processes.
Understand How Punctures and Penetrations Occur
High-velocity debris can create punctures or penetrations that weaken the roof’s waterproof barrier. Noting the size and location of these punctures is important when coordinating with repair professionals and insurers.
Identify Signs of Compromised Roof Seals and Adhesives
Rapid temperature changes and physical stress can cause roof seals and adhesives to fail, leading to loosened shingles. Identifying these compromised areas helps determine if a full roof replacement or localized repairs are necessary.
Assess Damage to Flat or Low-Slope Roofing Systems
Flat or low-slope roofs are particularly prone to pooling water, membrane tears, or seam separations. Detailed inspection of these areas is critical since water accumulation can quickly lead to leaks.
Recognize Structural Damage to Roof Trusses or Decking
Severe hurricanes may damage not only the roofing material but also underlying structural components like trusses and decking. Warping, sagging, or movement in these areas is a serious concern that usually requires a professional structural engineer’s assessment before repairs or a full roof replacement is undertaken.
Documenting Findings and Next Steps for Your Hurricane Roof Damage Inspection
Thorough documentation of all findings is essential for guiding repairs, filing insurance claims, and planning preventive measures. Organized records expedite the restoration process and ensure that all damage is properly addressed.
Take Clear Photographs and Videos of All Identified Damage
Document every damage point—from missing shingles to cracks and water stains—with clear photographs and videos. This visual evidence is critical for insurance claims and helps professionals understand the scale and nature of repairs needed.
Create Detailed Notes During Your Roof Damage Inspection
Supplement photos with written notes detailing each damage instance, including location, type, and severity. Recording environmental conditions and past maintenance history adds credibility to your documentation.
Organize Your Documentation for Insurance Claims
Arrange your notes and photographic evidence in a logical order, ideally by damage type or location. A well-organized file simplifies the claims process and assists contractors in providing accurate repair estimates.
Obtain Quotes From Reputable Roofing Contractors
With complete documentation, consult several reputable roofing contractors to get repair or replacement quotes. Comparing multiple estimates ensures fair pricing and quality workmanship.
Secure Temporary Repairs to Prevent Further Damage
Implement temporary measures such as applying tarps or sealants to exposed areas to prevent additional water intrusion or wind damage until permanent repairs can be made.
Table: Comparison of Roof Damage Indicators
Below is a summary table comparing key indicators of hurricane-induced roof damage.
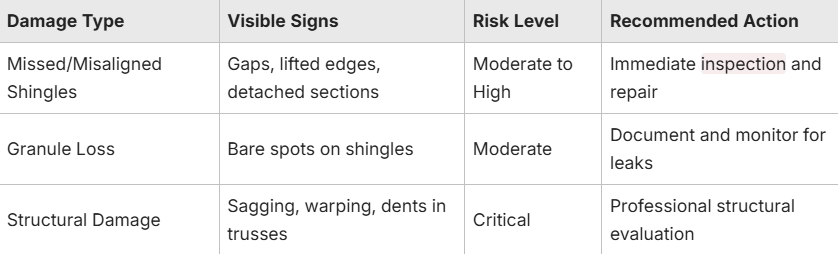
The table highlights that different damage levels require tailored responses to prevent further issues.
Frequently Asked Questions
Q: How soon should I inspect my roof after a hurricane?
A: Perform a preliminary inspection as soon as it is safe, typically within 24-48 hours, to identify visible damage and arrange temporary repairs.
Q: What if I suspect hidden damage but can’t safely access the roof?
A: It is advisable to have a professional roof inspection, as experts can use specialized equipment to identify hidden issues safely.
Q: Can I file an insurance claim based on a homeowner’s inspection?
A: While your inspection provides a good starting point, many insurers require a professional report, so document all findings thoroughly.
Q: How do I choose a reputable roofing contractor?A: Look for licensed contractors with positive reviews and experience in hurricane repair, and obtain multiple quotes for fair pricing.
Q: What temporary measures can I take until repairs are completed?A: Installing tarps, sealing visible gaps, and clearing debris from gutters can help lessen further damage while waiting for professional repairs.
Final Thoughts
Hurricane roof damage requires prompt and careful inspection to safeguard home safety and structural integrity. Following a structured process—from ground-level assessments to detailed interior and exterior inspections—allows homeowners to detect even subtle damage early. Comprehensive documentation assists with insurance claims and repair estimates, while professional consultations help secure effective solutions. Ultimately, an informed and proactive approach minimizes repair costs and reinforces the home against the continued challenges of severe weather.


